Erie & Pittsburgh Branch Model Railroad 2008 Pictures
Due to popular request, I'm posting some pictures of the layout through its construction. The newest pictures are at the top.
Previous pictures
March 8, 2008
 The second part of the embankment after carving with the hot wire tool.
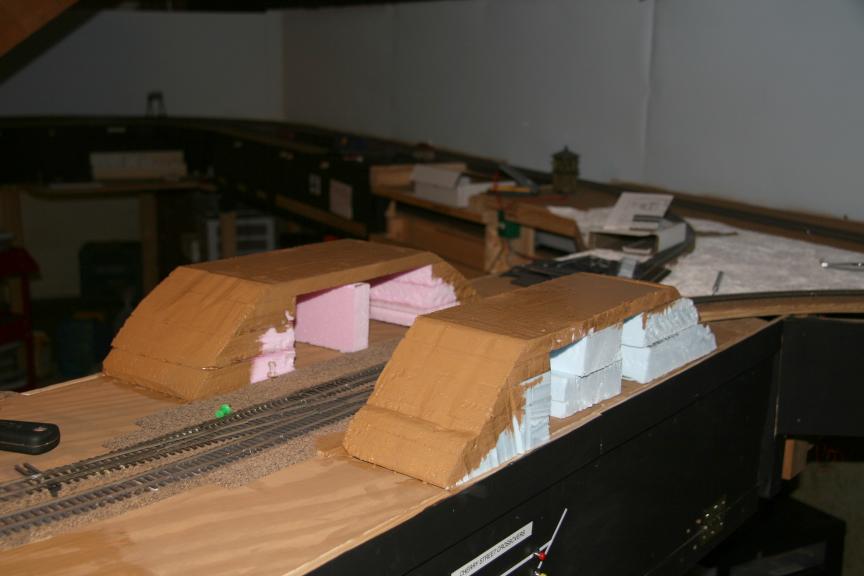 Both embankments were painted with brown paint to hide the pink and blue foam colors.
 I mixed up a couple buckets of Sculptamold to ease the transitions between the plywood and cork base used for
the road and the Lawrence Ice siding. I mixed the Scultamold per its instructions, and then poured in enough
brown paint to make the mix the same brown color as the original paint. This resulted in a mixture about the
consistency of soft peanut butter. I then spread it using a flat spreading tool to build up the shoulders of the road
and around the ice spur track. It was kind of like frosting a cake.
I mixed up a couple buckets of Sculptamold to ease the transitions between the plywood and cork base used for
the road and the Lawrence Ice siding. I mixed the Scultamold per its instructions, and then poured in enough
brown paint to make the mix the same brown color as the original paint. This resulted in a mixture about the
consistency of soft peanut butter. I then spread it using a flat spreading tool to build up the shoulders of the road
and around the ice spur track. It was kind of like frosting a cake.
 I also applied a layer of brown Sculptamold to most of the area around the wye at Castle Tower. Previously this
area had been covered over with a layer of plaster cloth over a web of cardboard strips.
I also applied a layer of brown Sculptamold to most of the area around the wye at Castle Tower. Previously this
area had been covered over with a layer of plaster cloth over a web of cardboard strips.
 The sides of the embankments also received a coat of brown Sculptamold to cover the seams between the
foam pieces. I checked the Sculptamold a couple of hours after I applied it, and it was still damp. With the extra
paint mixed in to give it the brown color, I sure this stuff eventually dries completely...
The sides of the embankments also received a coat of brown Sculptamold to cover the seams between the
foam pieces. I checked the Sculptamold a couple of hours after I applied it, and it was still damp. With the extra
paint mixed in to give it the brown color, I sure this stuff eventually dries completely...
March 7, 2008
 Before I did too much work near the front of the layout, I wanted to install a track bumper on the Lawrence
Ice spur. Since that track is at the far rear corner of that part of the layout, I really wanted to make sure
that no cars ran off the end of the track. Pictured here is a Tomar Industries code 83 bumper. You can also see
the additional piece of cork I installed past the end of track to support the bumper. The white "tombstone"
in the rails are gaps cut to prevent a short circuit when the bumper is installed (it is all metal, and would short
across the rails).
Before I did too much work near the front of the layout, I wanted to install a track bumper on the Lawrence
Ice spur. Since that track is at the far rear corner of that part of the layout, I really wanted to make sure
that no cars ran off the end of the track. Pictured here is a Tomar Industries code 83 bumper. You can also see
the additional piece of cork I installed past the end of track to support the bumper. The white "tombstone"
in the rails are gaps cut to prevent a short circuit when the bumper is installed (it is all metal, and would short
across the rails).
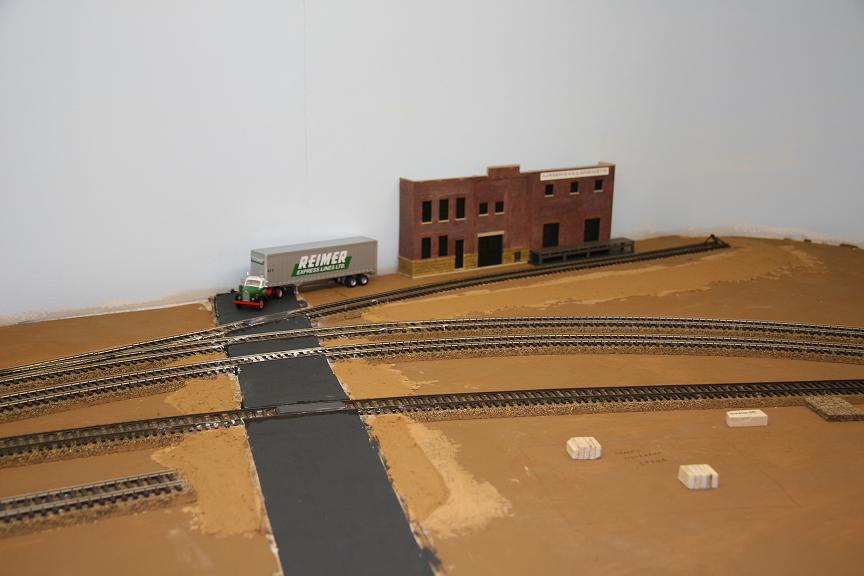
 Here is Grant Street after repairing the damaged section. The next step involved apply an blacktop topping with
a foam brush to give the road the color and texture of asphalt road.
Here is Grant Street after repairing the damaged section. The next step involved apply an blacktop topping with
a foam brush to give the road the color and texture of asphalt road.
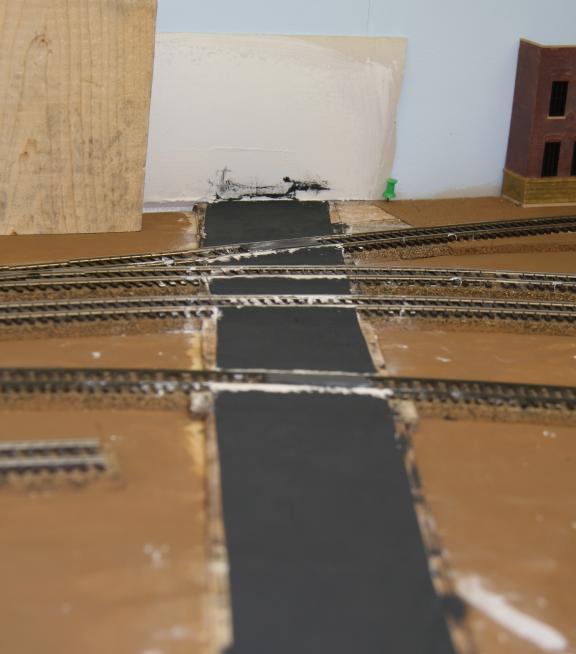 And here is Grant Street after "blacktopping". The white parts near the rails were touched up later on, as
I didn't want to get the blacktop topping too close to the tracks.
And here is Grant Street after "blacktopping". The white parts near the rails were touched up later on, as
I didn't want to get the blacktop topping too close to the tracks.
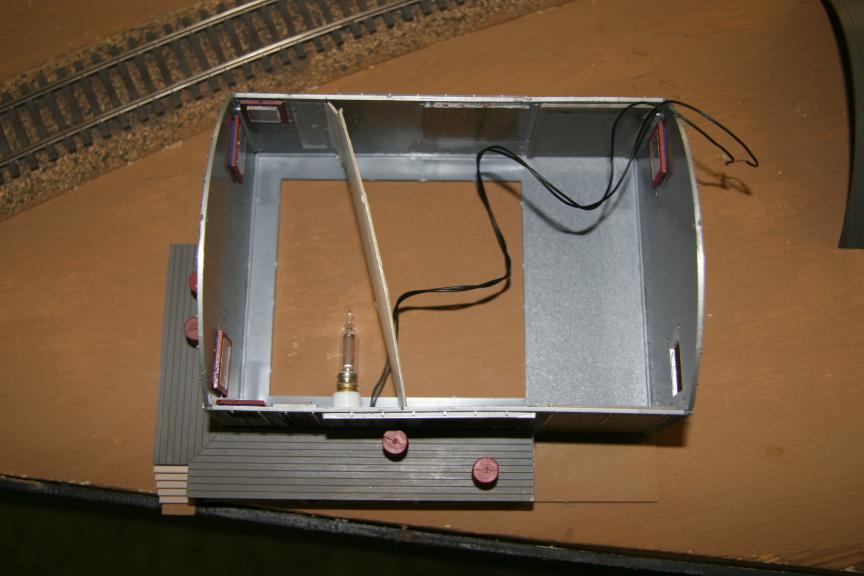 Here's the way I added lightng to the Agway Petroleum office. I installed a cardboard partition inside the building
to prevent the light from lighting up the whole building. This will keep the windows in the far end of the building
dark even the bulb is lit. I used some electrical tape on the inside of the building near the joint at the foundation
to keep some light from leaking through to the outside. Finally I glued the bulb and socket to the inside wall with
Walthers Goo. By placing the bulb on this wall near the floor, it will prevent viewers from seeing it. (On the layout,
the building will be viewed mostly from the lower left in this picture.) I also added a cardboard piece as a roof to the
lighted section to prevent light from leaking out around the joint of the roof.
Here's the way I added lightng to the Agway Petroleum office. I installed a cardboard partition inside the building
to prevent the light from lighting up the whole building. This will keep the windows in the far end of the building
dark even the bulb is lit. I used some electrical tape on the inside of the building near the joint at the foundation
to keep some light from leaking through to the outside. Finally I glued the bulb and socket to the inside wall with
Walthers Goo. By placing the bulb on this wall near the floor, it will prevent viewers from seeing it. (On the layout,
the building will be viewed mostly from the lower left in this picture.) I also added a cardboard piece as a roof to the
lighted section to prevent light from leaking out around the joint of the roof.
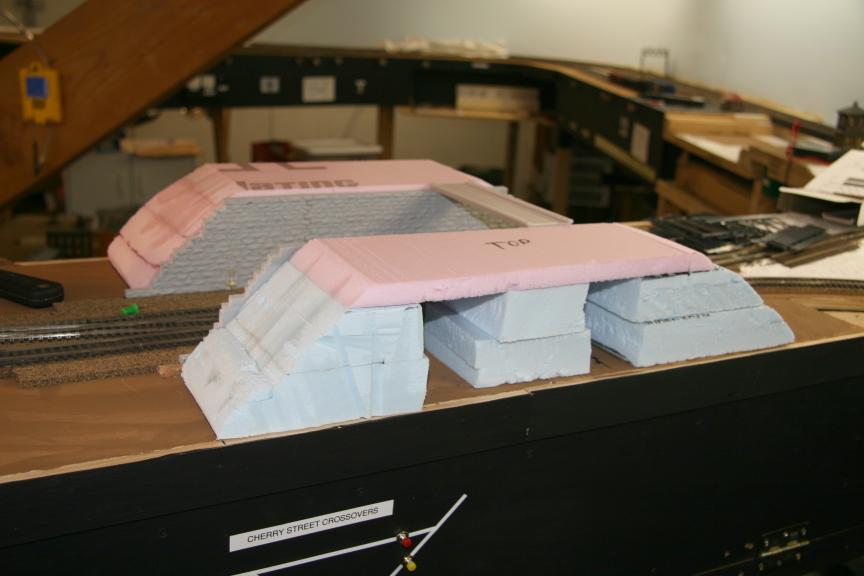
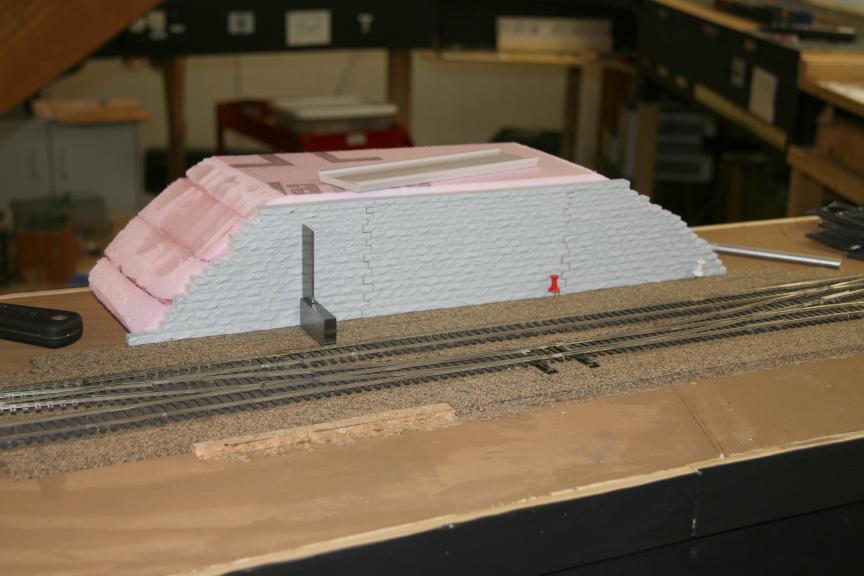 Here is one of the embankments of the B&O/P&LE overpass after being carved down with my hot wire
foam cutter. That is the neatest tool! The abutment wall in front the embankment is made from three Chooch
retaining wall sections, glued together. I then cut with my jigsaw and a jeweler's saw blocks out of the ends to
give it that stepped appearance, just like the prototype.
Here is one of the embankments of the B&O/P&LE overpass after being carved down with my hot wire
foam cutter. That is the neatest tool! The abutment wall in front the embankment is made from three Chooch
retaining wall sections, glued together. I then cut with my jigsaw and a jeweler's saw blocks out of the ends to
give it that stepped appearance, just like the prototype.
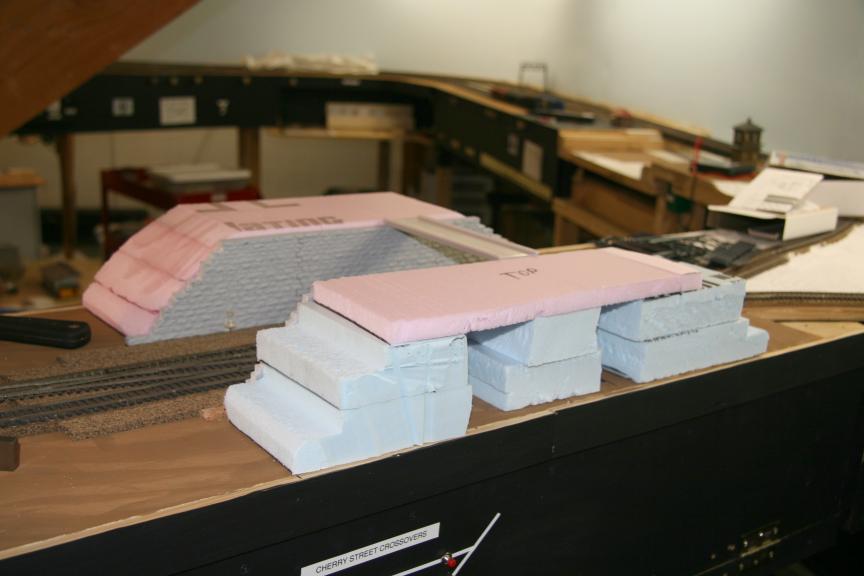 Here is the other part of the embankment in progress. To speed construction, I used two pieces of 1.5 inch foam instead
of three pieces of 1 inch foam like I used on the other embankment section. The top of both were made with a piece
of half-inch foam.
Here is the other part of the embankment in progress. To speed construction, I used two pieces of 1.5 inch foam instead
of three pieces of 1 inch foam like I used on the other embankment section. The top of both were made with a piece
of half-inch foam.
March 1, 2008
This was first foray into street paving. I used a Woodland Scenic road paving "learning kit" to build Grant Street. It was quite a "learning" experience. While this technique is messy, the results are good. However, I may experiment with using sheet styrene for some of the other roads on the layout and see which is easier and produces a better result.
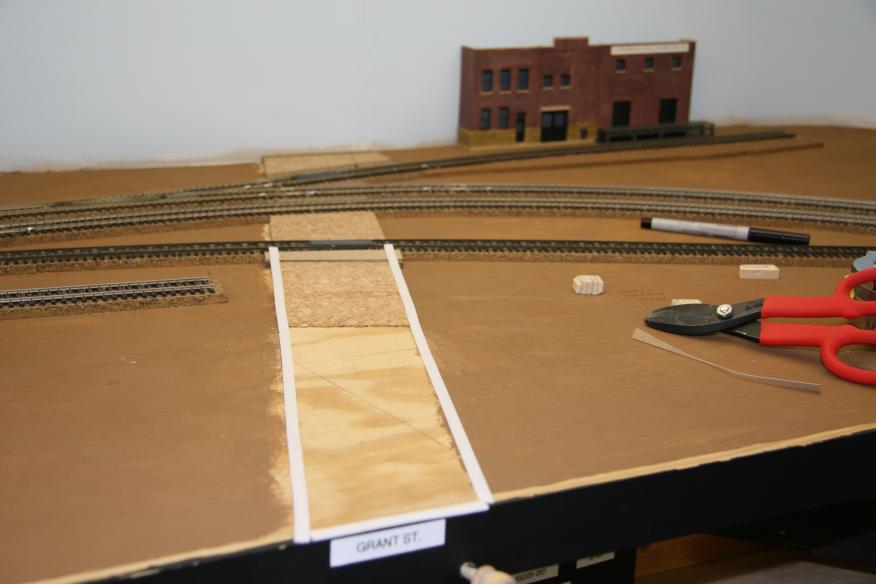 The first step involves laying down a foam tape along the shoulders of the road.
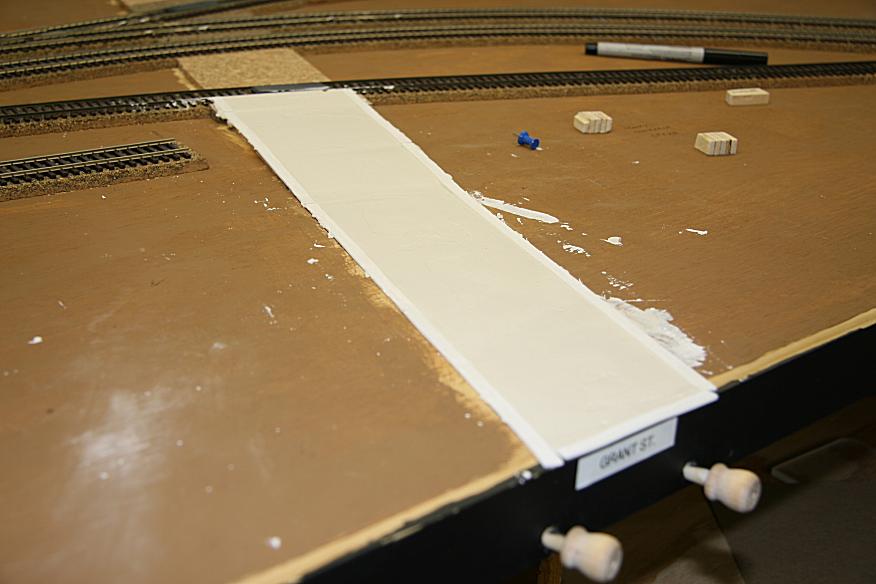 Next, you mix up this stuff called Smooth-It (looks like flour) with water and pour the mix between the tape. Then
using a smoothing tool (a piece of styrene), you run it across the top of the tape back and forth to smooth out the
Smooth-It, and then let it dry. Here's the result of the first section of Grant Street. Notice that I used cork to raise
the level of the road to meet the tracks in the background, and then dropped the road down a grade to end up on
top of the plywood.
Next, you mix up this stuff called Smooth-It (looks like flour) with water and pour the mix between the tape. Then
using a smoothing tool (a piece of styrene), you run it across the top of the tape back and forth to smooth out the
Smooth-It, and then let it dry. Here's the result of the first section of Grant Street. Notice that I used cork to raise
the level of the road to meet the tracks in the background, and then dropped the road down a grade to end up on
top of the plywood.
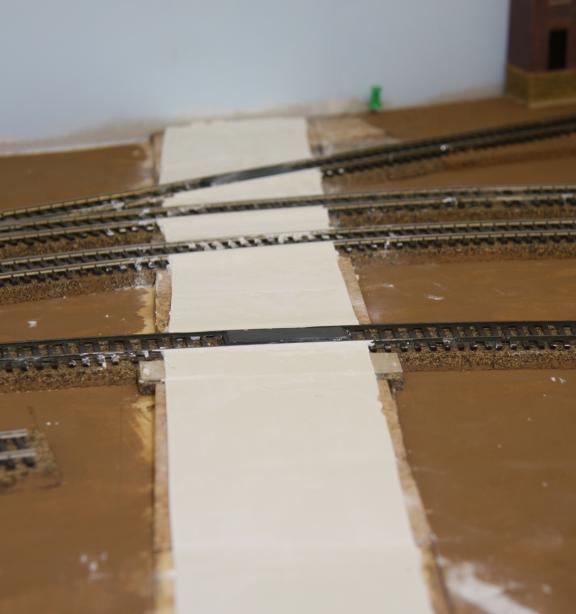
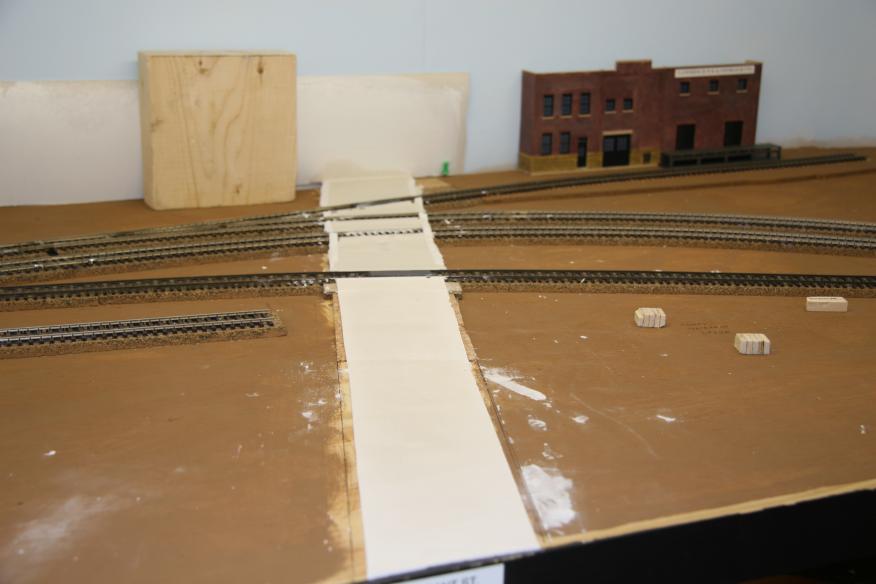 The finished Grant Street. Well, almost... There was a section between the Agway Petroleum and the main line where
I used a piece of cardboard to shim the road up a little bit to better meet up with the rails at the grade crossing.
Unfortunately, I didn't secure it down as well as I thought, and it curled up, buckling the road. So I will have to
cut that section out and redo it.
The finished Grant Street. Well, almost... There was a section between the Agway Petroleum and the main line where
I used a piece of cardboard to shim the road up a little bit to better meet up with the rails at the grade crossing.
Unfortunately, I didn't secure it down as well as I thought, and it curled up, buckling the road. So I will have to
cut that section out and redo it.
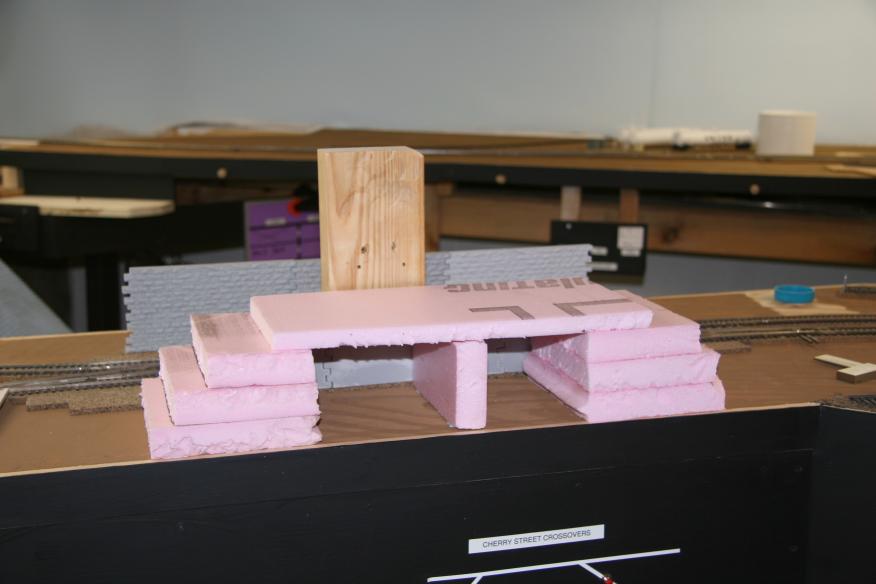 Meanwhile, while the road was drying, I was also working on the overpass of the B&O and P&LE at
Cherry Street. This is the start of one the embankments, made with foam sheets. The piece in the middle is
used to give strength to the top.
Meanwhile, while the road was drying, I was also working on the overpass of the B&O and P&LE at
Cherry Street. This is the start of one the embankments, made with foam sheets. The piece in the middle is
used to give strength to the top.
Feburary 27, 2008
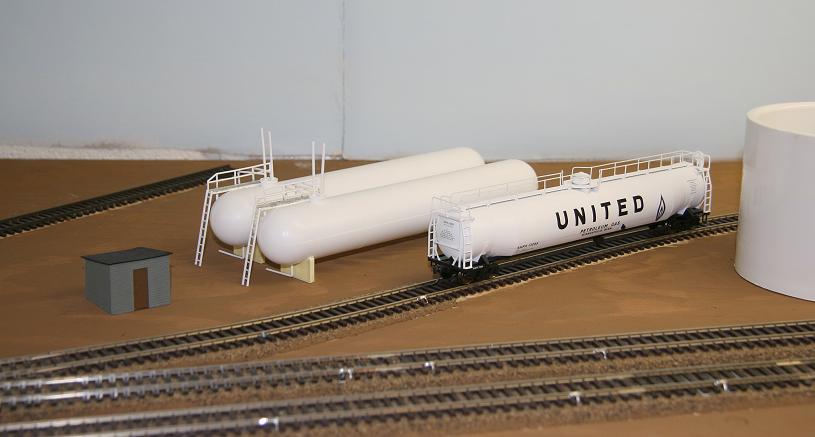 Another recent project was this pair of propane tanks along the north spur at Shenango China. From what
I've been able to determine, the prototype received shipments of propane, most likely used to fuel the kilns
or other equipment in the plant. The tanks are gone today, but the concrete foundations still stand behind
the plant next to the prototype's north end spur track. Walthers produced two kits with propane tanks. One was
called Central Gas and Supply, which had tanks, an office building, pump houses, and other details. The other
(which I used) included just the pair of propane tanks. Fortunately, the kit I bought used the same parts sprues
from the Central Gas and Supply kit, so it included the walls to both pump houses and lots of little propane tank
detail parts. I brush-painted the tanks with Polly Scale reefer white and assembled them following the kit
instructions. I used Polly Scale EL gray to paint the walls of the pump house, then assembled the pump house.
I painted the door with D&RGW Building Brown paint. Because the pump house roof wasn't included in my kit,
I cut a piece of cardstock to size, "painted" it with a large Sharpie marker, and glued it to the walls using a thin
layer of yellow glue. The white thing on the right is a 4" PVC coupling I bought at Home Depot that will
become the oil storage tank for Shenango China, once I put a roof on it. (Why did Shenango China receive
both propane and fuel oil by rail? I don't know, but apparently they did.)
Another recent project was this pair of propane tanks along the north spur at Shenango China. From what
I've been able to determine, the prototype received shipments of propane, most likely used to fuel the kilns
or other equipment in the plant. The tanks are gone today, but the concrete foundations still stand behind
the plant next to the prototype's north end spur track. Walthers produced two kits with propane tanks. One was
called Central Gas and Supply, which had tanks, an office building, pump houses, and other details. The other
(which I used) included just the pair of propane tanks. Fortunately, the kit I bought used the same parts sprues
from the Central Gas and Supply kit, so it included the walls to both pump houses and lots of little propane tank
detail parts. I brush-painted the tanks with Polly Scale reefer white and assembled them following the kit
instructions. I used Polly Scale EL gray to paint the walls of the pump house, then assembled the pump house.
I painted the door with D&RGW Building Brown paint. Because the pump house roof wasn't included in my kit,
I cut a piece of cardstock to size, "painted" it with a large Sharpie marker, and glued it to the walls using a thin
layer of yellow glue. The white thing on the right is a 4" PVC coupling I bought at Home Depot that will
become the oil storage tank for Shenango China, once I put a roof on it. (Why did Shenango China receive
both propane and fuel oil by rail? I don't know, but apparently they did.)
Feburary 19, 2008
 A couple of my so-called "football projects" this past fall (because I work on them Sunday afternoons while
watching football--during the rest of the year they're called "NASCAR projects") are pictured here. The crane
and loading dock are from the Walthers Team Track kit and seen here installed on the New Castle team track. The
boxcar is an Accurail 50' boxcar decaled with Turtle Creek Central decals that were included in a Model Railroader
magazine from several years ago. The boxcar was a "data only" model that I added the road name, herald,
and reporting marks decals to. It was a nice diversion and makes for a unique car on the layout.
A couple of my so-called "football projects" this past fall (because I work on them Sunday afternoons while
watching football--during the rest of the year they're called "NASCAR projects") are pictured here. The crane
and loading dock are from the Walthers Team Track kit and seen here installed on the New Castle team track. The
boxcar is an Accurail 50' boxcar decaled with Turtle Creek Central decals that were included in a Model Railroader
magazine from several years ago. The boxcar was a "data only" model that I added the road name, herald,
and reporting marks decals to. It was a nice diversion and makes for a unique car on the layout.
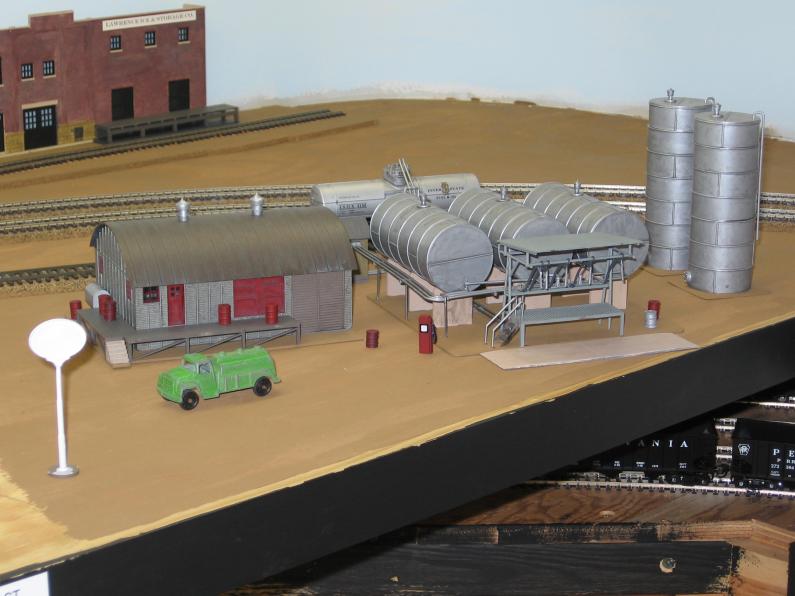 My other major "football project" this winter was the Agway Petroleum dealer at Grant Street. I built this
from a Walthers Interstate Fuel & Oil kit. The structures are all held in place on the layout to keep them moving
around. I used a pair of small wood blocks inside the office building to hold it in place. The fuel tanks and truck rack
are held down with a screw, hidden underneath the red 55-gallon drum on the right (behind the silver drum) that I
cut the bottom off of. The only things that still need to be done on this complex are interior lighting and an
"Agway" sign for the outside of the office. I have artwork for a modern Agway emblem, but I need to find
out if it is the same emblem that Agway used in 1969. (Anyone know?)
My other major "football project" this winter was the Agway Petroleum dealer at Grant Street. I built this
from a Walthers Interstate Fuel & Oil kit. The structures are all held in place on the layout to keep them moving
around. I used a pair of small wood blocks inside the office building to hold it in place. The fuel tanks and truck rack
are held down with a screw, hidden underneath the red 55-gallon drum on the right (behind the silver drum) that I
cut the bottom off of. The only things that still need to be done on this complex are interior lighting and an
"Agway" sign for the outside of the office. I have artwork for a modern Agway emblem, but I need to find
out if it is the same emblem that Agway used in 1969. (Anyone know?)